A successful photo shoot begins with an in-depth photo brief. A photo brief provides photographers, stylists, assistants and influencers with all the information they need in order to work efficiently as a team. It’s part vision board and part instructional manual.
Here’s On Q’s seven step guide for creating an informative photo brief:
1. Begin with a theme:
The best way to tell a story through your photos is to follow a theme or themes that work well together to convey your message. For instance, if the purpose of the photo shoot is to create images to use in your social media content calendar for July and August, you may wish to go with an outdoorsy theme which could include a picnic set up.
Check out the images below from one of On Q’s summer photo shoots as an example:
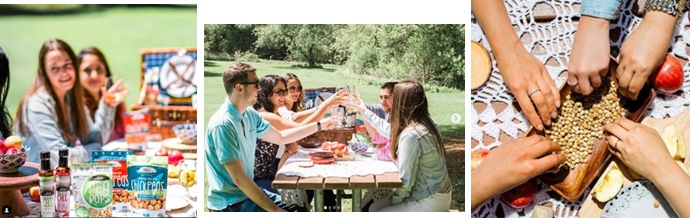
We knew that in order to make our picnic set look and feel believable and authentic, we would need props and products. Since we were running an influencer campaign for one of our clients, Three Farmers Foods, at around the same time, we decided to include the brand in our photo shoot. We married the summer theme with the Three Farmers Food brand and the results were amazing! We captured pictures that provided us content for a number of posts including the first day of summer, team culture and client love.
2. The obvious details:
It might sound obvious, but a photo brief should always include a list of important details. This information should be clearly labeled somewhere at the top of the brief. Information to include:
- date of shoot
- location
- time of shoot
- length of shoot
- number of models
- number of images to be delivered
These details help to inform the photographer about the basics.
3. Blurred lines details:
Next you want to focus on defining the not so clear details that you would assume people might know, but we all know what happens when we ass-u-me. Define the purpose of the photo and ask yourself:
- Are these images for social only?
- Do I plan to use them on a website?
- Will they be used for advertising? What kind of ads?
- Which platforms will I be using these images on? Instagram, Facebook, LinkedIn, Twitter, Snapchat, etc?
- Is there a colour scheme that should be used in the photo?
- If the images are for a brand, what are the brand colours and how would you like them to be translated into the images?
4. Plans for a rainy day:
It’s the one thing you definitely can’t control. The weather! Planning for a rain day means booking a second shoot day as an option, in case the weather simply does not cooperate. This is especially important if there are several people involved in the shoot like influencers, hair and makeup professionals, etc. The rain day should be booked within 1-2 days of the original shoot day so that you are not delaying the photography process too much.
5. Inspiration photos:
This is by far the best way to convey what you are looking for in the photos being captured. We recommend creating:
- a folder for each photo shoot, and,
- subfolders for each theme
Fill the folders up with images you would like to emulate. This is likely one of the most fun parts of putting together a photo brief, but it also takes a bit of time to complete. Our advice is to contribute over a period of time to the folders because you never know when you might find an image you love that sparks an idea.
Inspiration photos don’t have to be the exact image you would want to replicate. Photo shoots are the best time to flex your creative muscle. So what types of image should you include in your inspiration folders? Consider the following:
- a colour scheme
- a unique backdrop
- the expressions on the faces of the models
- flat lay images
- lighting that conveys a mood
- locations that look similar to where you plan to shoot
- attire
- product layout
6. Copyrights:
Another important item that can be included on a photo brief has to do with Copyrights. You want to ensure that the photos being produced are fully accessible to you or to your client. The last thing you want to hear after the effort you put into your photoshoot is that the rights will forever belong to someone else like say the photographer. This would mean that any time you wish to use the photos captured in your photoshoot you will need to go back to the photographer for permission, or worse, have to pay for the rights to use those images. Be clear in your intentions right off the bat so you don’t have to deal with these awkward conversations later.
7. Delivery date:
This is the date you will be receiving the final product, and in some cases, with certain photo shoots, the date of delivery is what matters most. Especially if you are planning to use the images on your social media within days of your photo shoot. Keep in mind, photographers don’t just snap a photo and then share it with you. If corrections or some editing is needed, it could take time. The standard for many photographers is two weeks following the shoot. If this is an emergency and you need the photos sooner, it should be communicated to the photographer as early as possible. Keep in mind, there may be extra fees for a rush order for obvious reasons.
Are there steps you follow when putting together a photo brief? Share your thoughts in the comments below and let’s get the conversation going.
Leave a Reply